Send your first broadcast campaign
Send an approved template to many contacts at once with the 4-step wizard — template, audience, personalize, review and send.
A broadcast sends one approved message template to a list of contacts. WhatsApp only lets businesses start a conversation with a template, so every broadcast needs one. If you don’t have one yet, see Create and submit a message template.
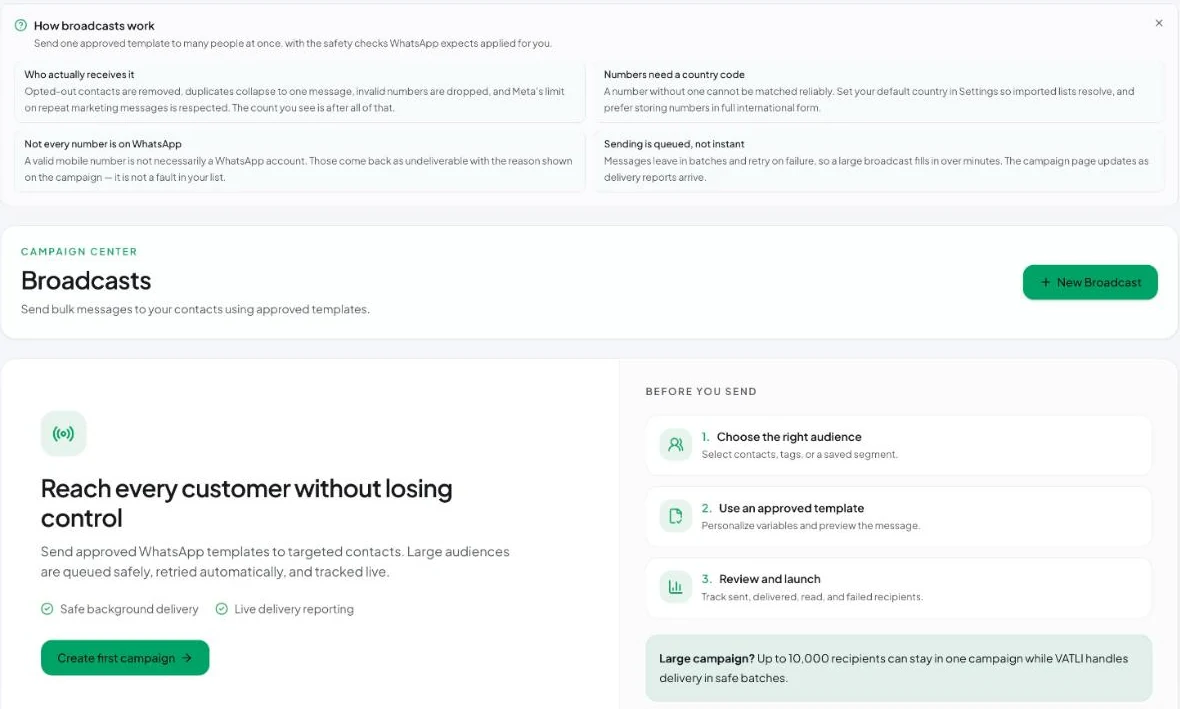
Before you start
- Your WhatsApp number is connected. Check it in Verify your connection.
- The template is Approved in Settings → Templates. Templates that are pending, rejected or paused don’t appear in the wizard.
- Your contacts have numbers with a country code. See Phone number format.
- You have a payment method in Meta, because Meta charges for template messages. See WhatsApp pricing.
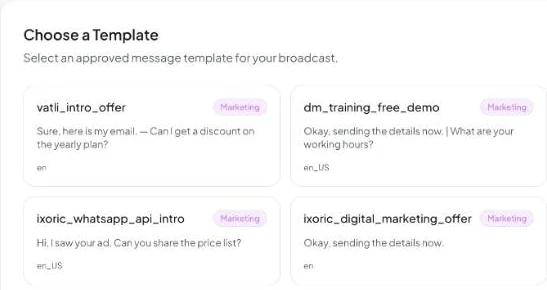
Step 1: Choose a template
- Go to Broadcasts and click New Broadcast.
- Pick an approved template from the list. You’ll see a preview of its body and buttons.
- Click Next.
Step 2: Select the audience
- Pick who receives the message: all contacts, contacts with certain tags, a custom-field rule, a CSV file, a Google Sheet, a HubSpot list, people who came from a specific ad, or the recipients of an earlier broadcast.
- Optionally pick Exclude Tags to leave people out, for example customers tagged
purchased. - Click Next.
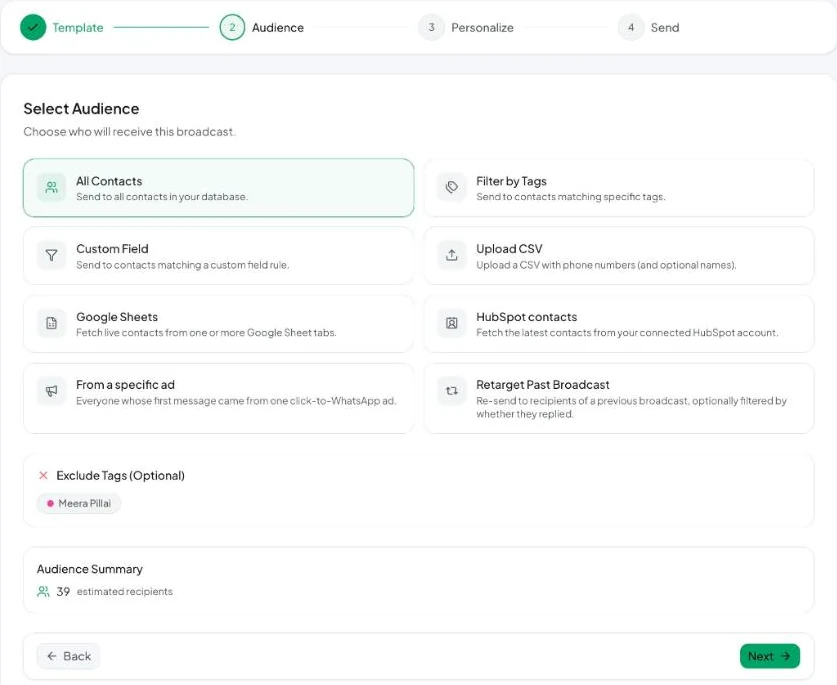
Each option is explained in Choose your broadcast audience.
Step 3: Personalize variables
If the template has variables such as {{1}} or a media header, fill them in here.
- For every variable, choose a Type:
– Static Value — the same text for everyone, e.g.20%.
– Contact Field — the contact’s Name, Phone or Email.
– Custom Field — any custom field you created, e.g.city. - If the template has an image header, paste a public Image URL (HTTPS).
- Check the Preview on the right. It shows the message with sample data.
- Click Next.
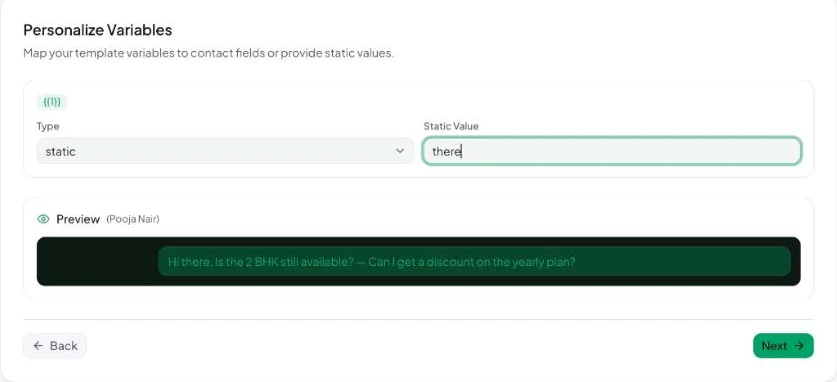
If a contact has no value for the field you mapped, WhatsApp may reject the message for that person (error 132000). Map a static value to optional fields, or filter the audience to contacts that have the field filled in.
Step 4: Review and send
- Enter a Broadcast Name, e.g. Diwali offer — Patna customers. Only your team sees it.
- Check the Summary: template, audience and number of variables mapped.
- Under When should this go out? choose Send now or Schedule for later. See Schedule a broadcast or save a draft.
- Click Send Broadcast (or Schedule).
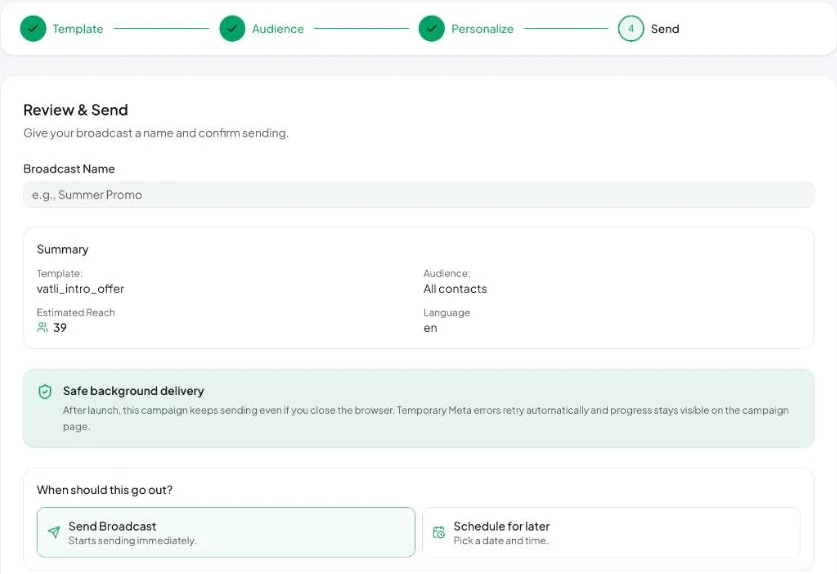
Vatli shows a progress bar while it prepares the recipients, then sends the messages in the background. You can close the tab. The campaign appears on the Broadcasts page with the status Sending, then Sent.
Who is skipped automatically
To protect your number, Vatli removes some recipients before sending:
- Contacts who opted out (sent STOP) or are blocked. See Opt-outs.
- Numbers that aren’t valid phone numbers.
- For Marketing templates: contacts who already got 2 marketing templates from you in the last 24 hours.
The full rules are in How broadcasts are delivered.
Next: Read the broadcast report.