Add the AI chat widget to your website
Put the same AI assistant on your website. Visitors share their name and phone before it replies, and the chat lands in your Contacts and Inbox.
Who can do this: Owner and AdminPlan: All plans with AI enabledNeed: Access to your website's code or themeTime: 10 minutes
The website widget is a chat bubble for your site, answered by the same AI assistant. A visitor shares their name and phone before it replies — so every chat becomes a lead in Contacts, with the full history in the Inbox, exactly like WhatsApp.
Step 1: Turn it on
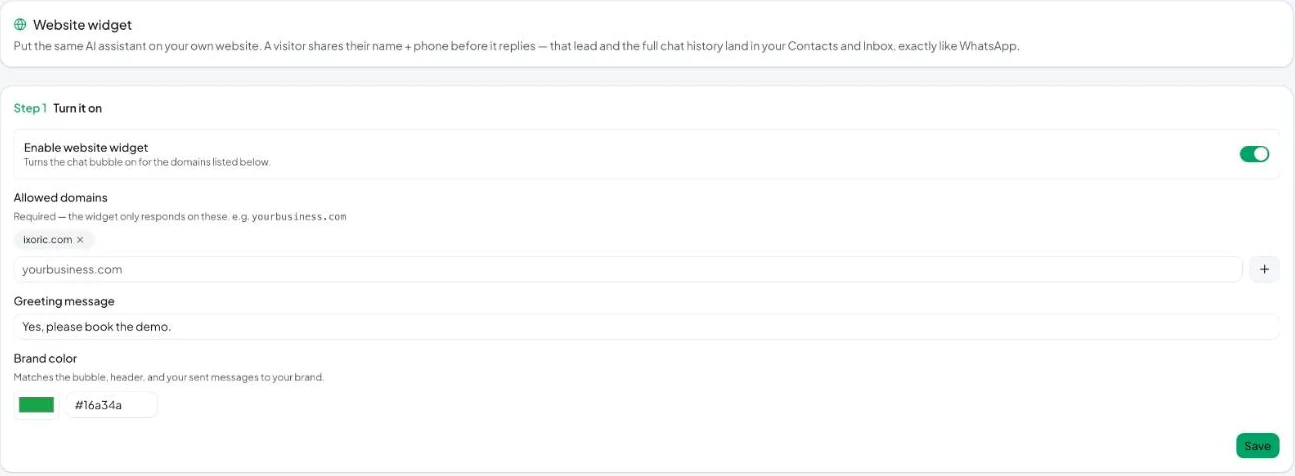
- Go to AI Agents → Website widget.
- Switch on Enable website widget.
- Under Allowed domains, add each domain the widget will run on, e.g.
yourbusiness.com, and click +. This is required — the widget only responds on these domains. - Write a Greeting message, e.g. Hi! How can we help you today?
- Pick a Brand color. It’s used for the bubble, header and your sent messages.
- Click Save. The Preview shows what visitors will see.
Step 2: Add it to your website
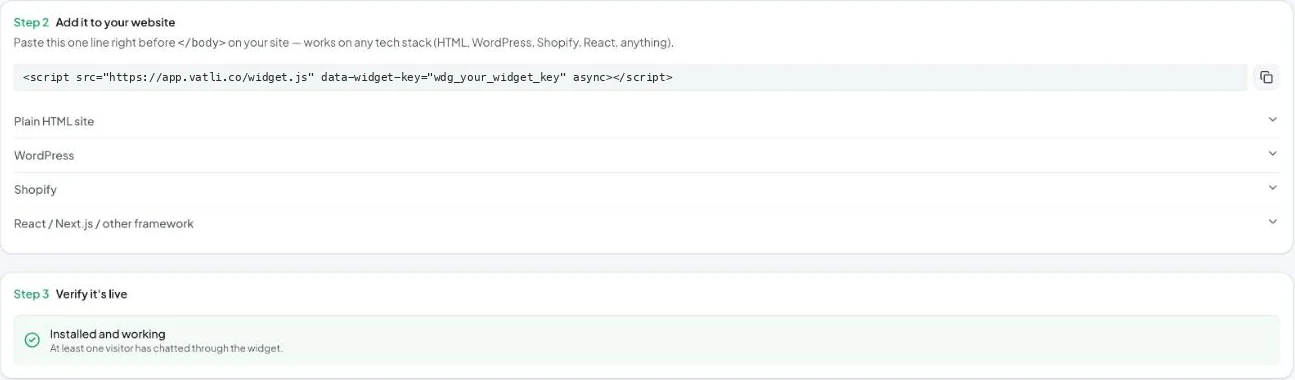
Copy the one-line embed code and paste it right before </body> on your site:
<script src="https://app.vatli.co/widget.js" data-widget-key="YOUR_WIDGET_KEY" async></script>
| Platform | Where to paste |
|---|---|
| Plain HTML | Open each .html file, paste before </body>, save and re-upload |
| WordPress | Appearance → Theme File Editor → footer.php (or a plugin such as “Insert Headers and Footers”), paste before </body> |
| Shopify | Online Store → Themes → ⋯ → Edit code → Layout → theme.liquid, paste before </body> and save |
| React / Next.js / other | Add it to your root layout before </body>, then rebuild and redeploy |
Step 3: Verify it’s live
Open your website and send a test message. Once a visitor has chatted through the widget, Step 3 shows Installed and working.
The widget won’t reply on a domain that isn’t in Allowed domains — including www. versions and staging sites. Add each one you use.