Invite and add team members
Bring teammates into your Vatli workspace with a one-time invite link, by email, or by creating their login directly.
Who can do this: Owner and Admin (the "Team & permissions" permission)Plan: All plans — the number of admin and agent seats depends on your planTime: 2 minutes
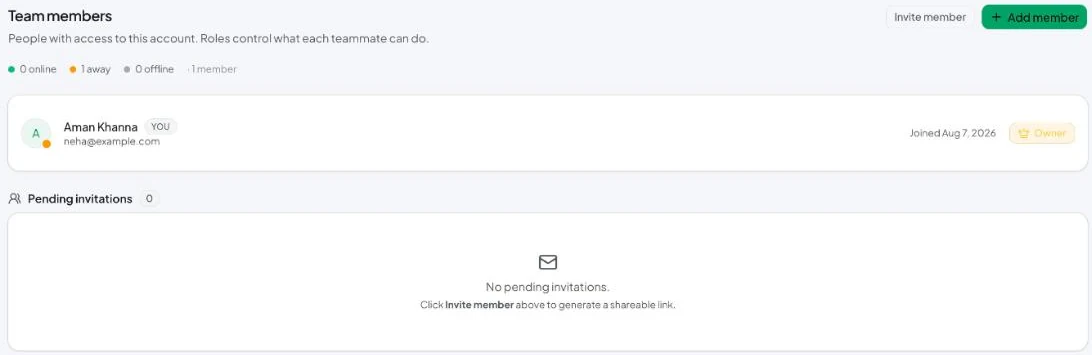
There are two ways to add someone. Use an invite link when the teammate should set their own password. Use Add member when you want to create the login for them.
Option 1: Invite with a link
- Go to Settings → Team members and click Invite member.
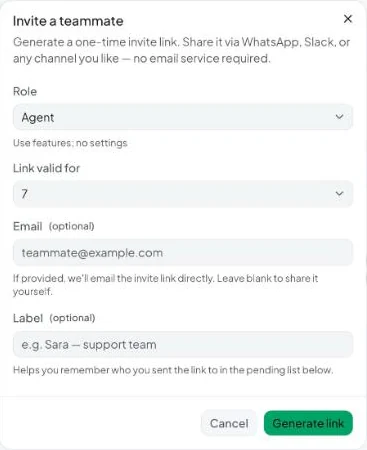
- Choose the Role: Admin, Agent or Viewer. See Roles and permissions.
- Choose Link valid for: 1 day, 7 days or 30 days.
- Optional: enter their Email and Vatli emails the link to them. Leave it blank to share the link yourself.
- Optional: add a Label, e.g. Sara — support team, to recognise the invite later.
- Click Generate link.
- Copy the link, or click Send via WhatsApp.
The invite link is shown only once. Vatli never stores it in readable form. If you lose it, revoke the invite and create a new one.
The teammate opens the link, signs up (or signs in) and joins your workspace with the role you chose. Until then the invite is listed under Pending invitations with its expiry. Click Revoke to cancel it.
Option 2: Add a member directly
- Click Add member.
- Enter Full name, Email and a Password (at least 8 characters), or click Generate a password.
- Set their Permissions.
- Click Add member.
- Click Copy credentials and share them securely. The password is shown only once.
They can sign in straight away.
Change a role or remove someone
- Use the role menu on a member’s row to change their role.
- Click Remove to take them out of the workspace. They’re signed out of it and get a fresh personal account next time they sign in. Their login isn’t deleted.
The owner can’t be removed. Seats used are shown in Reports → Plan usage and Settings → Billing & plan.