Build your first chatbot flow
Create a button-driven WhatsApp chatbot from a ready template or from scratch, connect the nodes on the canvas and activate it.
Who can do this: Owner and Admin by default (the "Automations & flows" permission)Plan: All plansTime: 15 minutes
A flow is a menu the customer taps through — a chatbot that answers without an agent. Flows are in Beta.
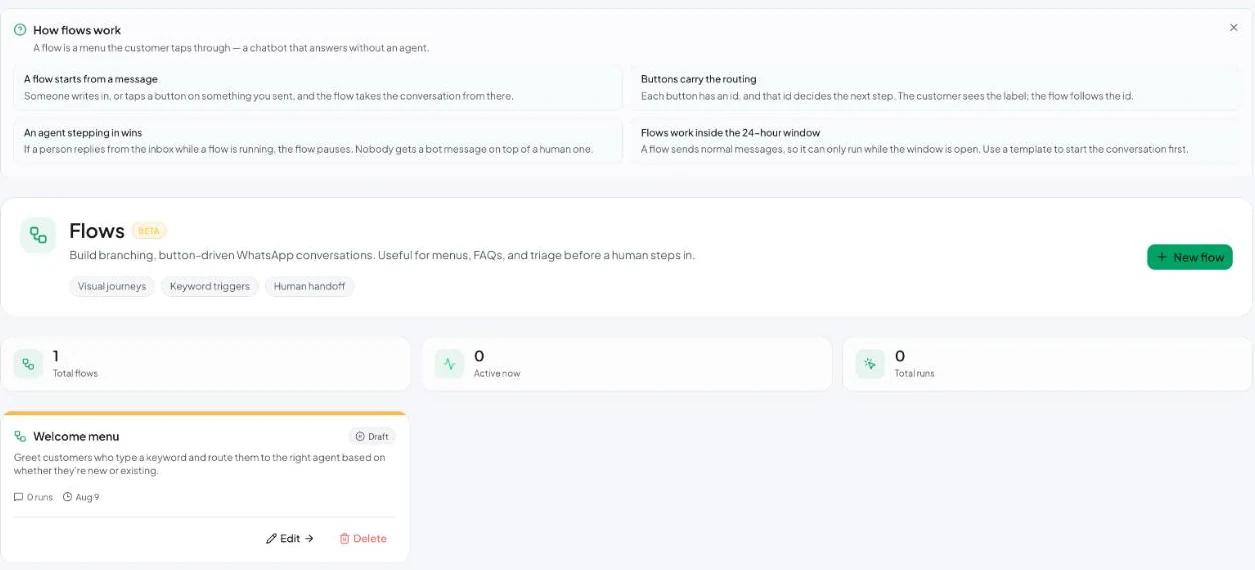
How flows work
- A flow starts from a message. Someone writes in, or taps a button on something you sent, and the flow takes the conversation from there.
- Buttons carry the routing. Each button has an id, and that id decides the next step. The customer sees the label; the flow follows the id.
- An agent stepping in wins. If a person replies from the inbox while a flow is running, the flow pauses.
- Flows work inside the 24-hour window. A flow sends normal messages, so it can only run while the window is open. Use a template to start the conversation first. See The 24-hour window.
Create a flow
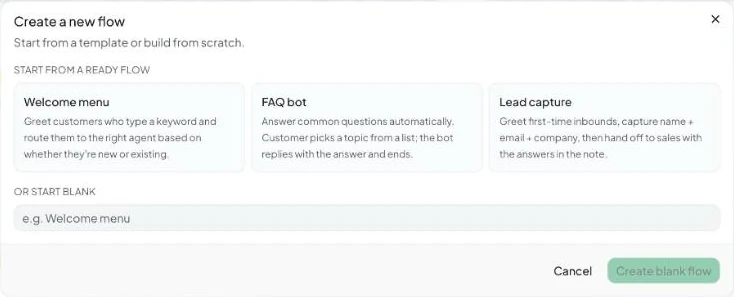
- Go to Flows and click New flow.
- Start from a ready flow, or type a name under Or start blank and click Create blank flow:
– Welcome menu — greets customers who type a keyword and routes them based on whether they’re new or existing.
– FAQ bot — the customer picks a topic from a list and the bot replies with the answer.
– Lead capture — asks first-time contacts for name, email and company, then hands off to sales with the answers in a note.
Build on the canvas
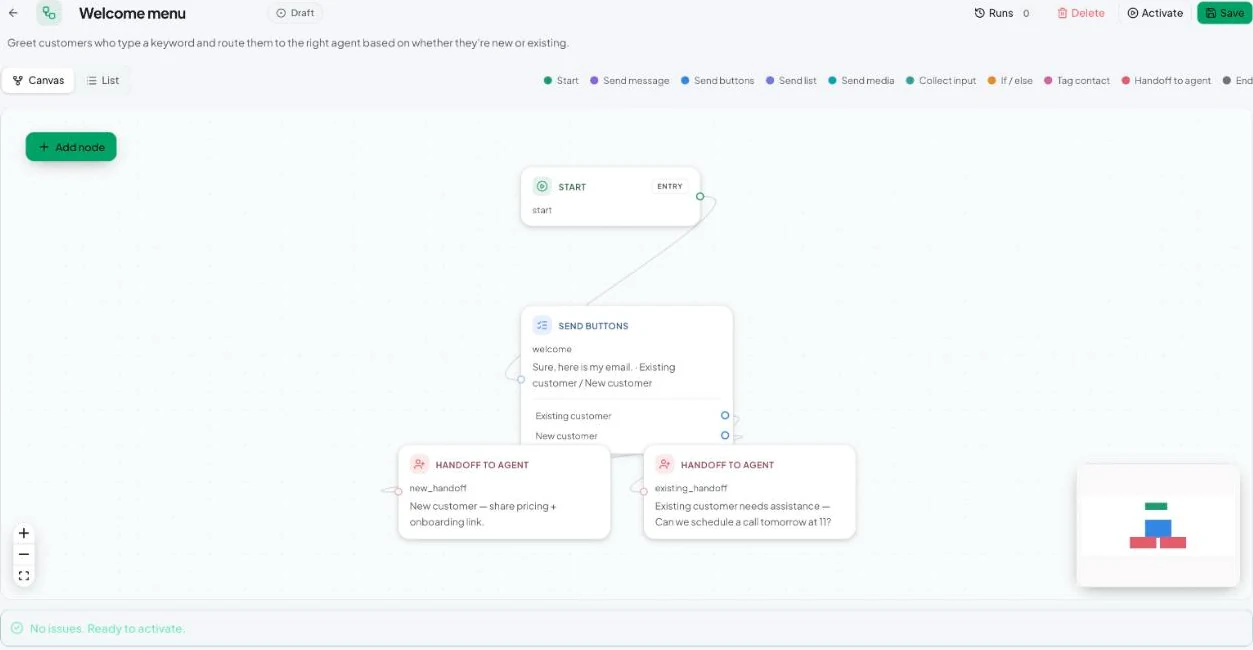
- Click Add node and pick a node type. See Flow node types.
- Click a node to edit it in the side panel — its text, buttons and the node each option leads to.
- Drag from a button’s dot to another node to connect them, or choose the next node in the panel.
- Switch between Canvas and List view at the top. List view is handy on small screens.
- Click Save.
Set the trigger and activate
- Open the flow’s trigger settings and choose When…:
– A message contains a keyword — enter keywords, e.g.hi, menu, help.
– Customer’s first ever inbound message.
– Manual only (no auto-trigger). - Pick the Entry node — usually Start.
- Check the validation bar. It must say No issues. Ready to activate. Click an issue to jump to the node.
- Click Activate.
The flow card now shows Active. Test it by sending the keyword from a personal WhatsApp number — not the business number itself.
Every flow should end in Handoff to agent or End. A customer should never be stuck with no way to reach a person.
Next: Flow node types.